In-app products are the digital goods that you offer for sale from inside your Android application to your app users. You cannot use In-app Billing to sell personal services, physical goods, or anything that requires physical delivery.
Product types
The Version 3 API supports managed in-app products and subscriptions to give you flexibility in how you monetize your application. You can specify these types of products by using the Google Play Developer Console.
- Managed in-app products:
When a managed in-app item is purchased by an user, Google Play stores the purchase information for each item on a per-user basis. - Subscriptions :
In In-app Billing, subscription plan offered you to sell content, services, or features to users from inside your app with recurring monthly or annual billing.
I will demonstrate a small example with In-app Billing,
To implement in app billing in your android project follow the below steps:
Step# 1: Installing the Google Play Billing Library
Before proceeding, verify you have installed the library by launching the Android SDK Manager by selecting the Eclipse Window -> Android SDK Manager option. Once loaded SDK Manager, scroll down to the Extras section and the Status column next to the Google Play Billing Library
Step# 2: Adding Billing Permission to the Manifest File
Add the following line in your AndroidManifest.xml file in order to make your app eligible to use in-App billing.
<uses-permission android:name=”com.android.vending.BILLING” />
Step# 3: Adding the Utility Classes to the Project
Find out the “TrivialDrive” sample project that was installed into the android SDK as part of the Google Play Billing library, includes a set of classes intended specifically for in-app billing implementation.
Locate the IInAppBillingService.aidl file in “TrivialDrive” sample project and add it to the package named “com.android.vending.billing”.
Then Select all nine Java files within “com.example.android.trivialdrivesample.util” package and copy and paste them into the <domainname>.inappbilling.util package of your InAppBilling project.
Step# 4: Designing the User Interface
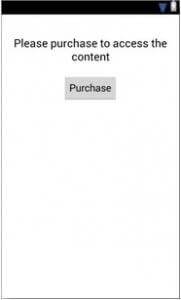
Design your UI according to your need. This is a sample design developed to demonstrate the In-App Billing.
Step# 5: Obtaining the Public License Key for the App
Google Play billing must be identified by a unique public license key. The only way to get a public license key is to register an application within the Google Play.
Go to http://play.google.com/apps/publish Once you are logged in, In home page of the Google Play Developer Console, click the Add new application button, which specifying the default language and a title of InAppBilling. Once the above information has been entered, click the Upload APK button:
This APK file upload is not necessary at this point, so once the application has been registered, click on the Services & APIs option to display the Base64-encoded RSA public key for the application.
Step# 6: Creating a New In-app Product
Select the In-app Products menu item from the left hand panel of the developer console.To add a new product, click on Add new product button and, in the result panel, set the product type to Managed product and enter a Product ID (in this case com.andolasoft.testInApp). Click on Continue and in the second screen By entering a title, description and price for the item. Change on the menu at the top of the page to Activate.
Step# 7: Implementing “Purchase” Button click
public class MainActivity extends Activity {

    private static final String TAG = "<your domain>.inappbilling";
    IabHelper mHelper;

    private Button clickButton;
    private Button buyButton;
    private static final String TAG = "com.andolasoft.testInApp";
    IabHelper mHelper;
    static final String ITEM_SKU = "android.test.purchased";
.    @Override
    protected void onCreate(Bundle savedInstanceState) {
        super.onCreate(savedInstanceState);
        setContentView(R.layout.main);

        buyButton = (Button)findViewById(R.id.buyButton);

        String base64EncodedPublicKey =
                                       "<your license key here>";

            mHelper = new IabHelper(this, base64EncodedPublicKey);

            mHelper.startSetup(new
            IabHelper.OnIabSetupFinishedListener() {
                    public void onIabSetupFinished(IabResult result)
             {
                       if (!result.isSuccess()) {
                         Log.d(TAG, "In-app Billing setup failed: " +
                    result);
                       } else {
                           Log.d(TAG, "In-app Billing is set up OK");
                              }
                      }
            });
    }
public void buyClick(View view) {
             mHelper.launchPurchaseFlow(this, ITEM_SKU, 10001,
                    mPurchaseFinishedListener, "mypurchasetoken");
/*The developer payload token string. This can be any string value and is used to identify the purchase. For the purposes of this example, this is set to “mypurchasetoken”.*/

    }
@Override
protected void onActivityResult(int requestCode, int resultCode,
     Intent data)
{
      if (!mHelper.handleActivityResult(requestCode,
              resultCode, data)) {
        super.onActivityResult(requestCode, resultCode, data);
      }
}
IabHelper.OnIabPurchaseFinishedListener mPurchaseFinishedListener
    = new IabHelper.OnIabPurchaseFinishedListener() {
    public void onIabPurchaseFinished(IabResult result,
                    Purchase purchase)
    {
       if (result.isFailure()) {
          // Handle error
          return;
     }
     else if (purchase.getSku().equals(ITEM_SKU)) {
         consumeItem();
        buyButton.setEnabled(false);
    }

   }
};
public void consumeItem() {
    mHelper.queryInventoryAsync(mReceivedInventoryListener);
}

IabHelper.QueryInventoryFinishedListener mReceivedInventoryListener
   = new IabHelper.QueryInventoryFinishedListener() {
       public void onQueryInventoryFinished(IabResult result,
          Inventory inventory) {


          if (result.isFailure()) {
          // Handle failure
          } else {
                 mHelper.consumeAsync(inventory.getPurchase(ITEM_SKU),
            mConsumeFinishedListener);
          }
    }
};
IabHelper.OnConsumeFinishedListener mConsumeFinishedListener =
      new IabHelper.OnConsumeFinishedListener() {
       public void onConsumeFinished(Purchase purchase,
             IabResult result) {

     if (result.isSuccess()) {
            //Here user paid for the app so write your logic to show the content to user
     } else {
             // handle error
     }
  }
};

@Override
public void onDestroy() {
    super.onDestroy();
    if (mHelper != null) mHelper.dispose();
    mHelper = null;
}

}
Step#8 : Upload the “APK”
Create the signed APK of your project and upload it in your added Application in Google Play Developer Console
Step# 9: Adding In-app Billing Test Accounts
Unfortunately, Google does not allow developers to make test purchases from their own Google accounts app billing, Other Google accounts used as testing accounts. . From ths ipoint on, in order to test in-app, the users of these Google accounts must load your application onto their devices and make test purchases. To add a test user account, click Settings icon located on the left hand side of your Google Play Developer Console home screen and on the account details screen scroll down to the License Testing section. In the corresponding text box, give the Gmail accounts for the users who will be performing the in-app testing on your behalf before saving the changes.
Note: This email Id should be the primary account of an android device where this app is to be tested. Check with Google policy before publishing the app to the android market place.
Conclusion: I hope you find this post useful to sell your android in-app products and services, make transaction smoother and easier, and improve your revenue. If you are looking for any assistance regarding android application development or other android integration, then you can contact us.
See Also: How to monetize your iOS app through Apple In-App Purchase integration
Like this blog? I’d love to hear about your thoughts on this. Thanks for sharing your comments.


