
Using work through customized scripts or applications is smart approach by System Administrators. For a busy system administrator to collect all the h/w and s/w information from the network is really tedious. For this work there fantastic open source tool named “OCS Inventory NG” which would collect all the h/w and s/w information from the network. But the web interface of OCS (where all the information about networked machines are visualized) is not much user friendly, rather confusing.
However, there is another open source application called GLPI, having a cool interface with capability to import & synchronize records from OCS.
For importing records from OCS to GLPI you have to use a plug-in in GLPI named OCS import and this plug-in manages the whole OCS synchronization process. To use OCS Import effectively, one need to make sure that the OCS mode is operational.
Here are the simple steps for the synchronization process:
Activate OCSNG mode in GLPI:
- Click on Setup; then select General-Restrictions [Tab]-Activate OCSNG mode – Set to YES and then click on Post.
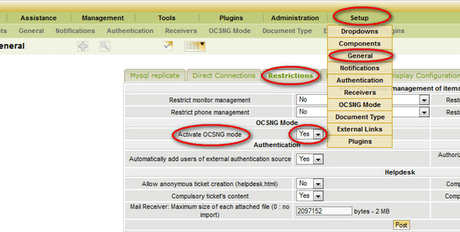
- Next, OCSNG mode, again go to the Setup tab and Click on OCSNG Mode
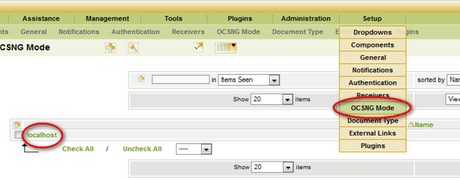
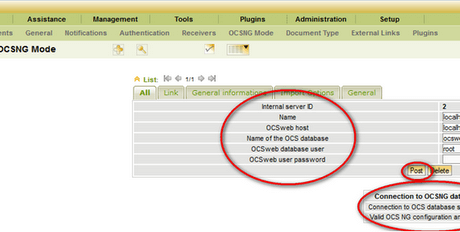
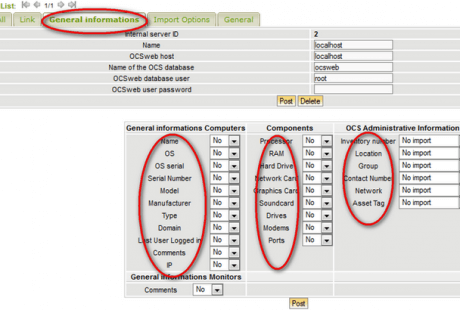
Now you will able to see one connection named localhost as pointed in the above image. Click on that localhost. Now you’ll see a simple form to enter DB credentials for the OCSNG application.
- Once providing all valid DB information about OCSNG application, click on Post and it pops-up message ‘Connection to OCS database successfully’.
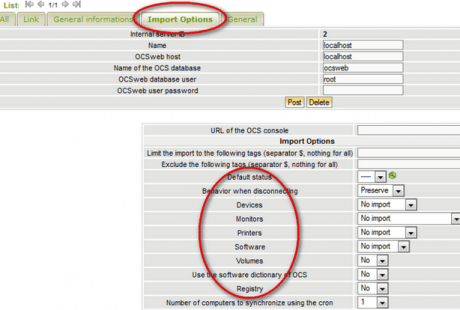
- There is another tab named Import Option in the same window. Here you can set up which information needs to be imported from OCSNG like monitor, printer, devices, registry and software. Choose those information and Click on Post to update the info.
- Beside the Import Options tab, there is a General Information tab where you can define which elements you want to import from OCS like OS, Serial Number, Model etc. You can choose those elements and click on Post to update it in GLPI.
 After completing the above steps you will able to see the data on the GLPI.
 Now we’ll see the steps on how to add custom fields into the Inventory List in GLPI.
How to add a custom field in GLPI:
To add custom fields to GLPI we need another plug-in named Custom Fields. It can be found in the Plug-in folder of GLPI archive.
- After installing this plug-in you can see a Custom Fields option in the drop down menu of Plug-ins Tab as indicated below.
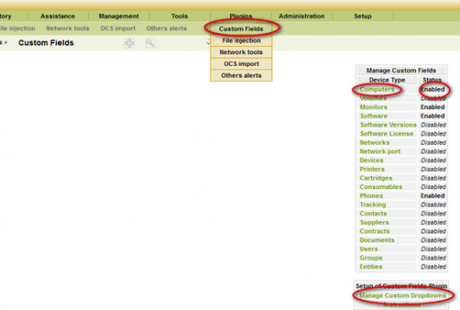
- By clicking on Custom Fields you can find a list of many device types like in the above image. Just click on the device name(s) on which you want the custom fields, to make it Enabled. You can also disable them in the same way when needed.
- Now to add fields click on the ‘Manage Custom Dropdowns‘ below the device list.
Suppose you want to add a custom filed named ‘Assigned to’ in the device Computers. Then first you need to enable the device Computers in Manage Custom Fields. After that go to Manage custom Dropdowns and add a label named ‘Assigned to’. You also need to add a System Name e.g.assigned_to1.You can check the Use Entities or Tree Structure boxes if you want to use them. Please find these steps indicated in the below image.
[Note: Later you can add more drop downs in the same way and click on the Update button to update the list.]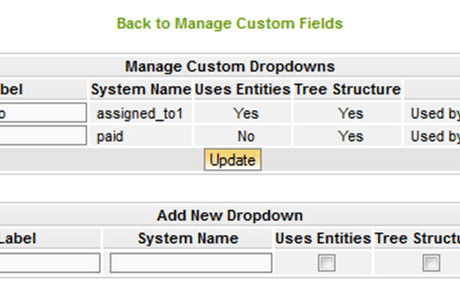
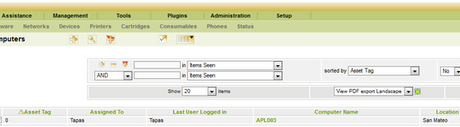
- Now you’ve to add these custom fields to you inventory. For that you need to go to the Inventory tab in the GLPI main menu and Click on Computers and then click on the + sign.

- You will get another pop-up window showing the column headers and here you can see that your custom field has been added to the list.
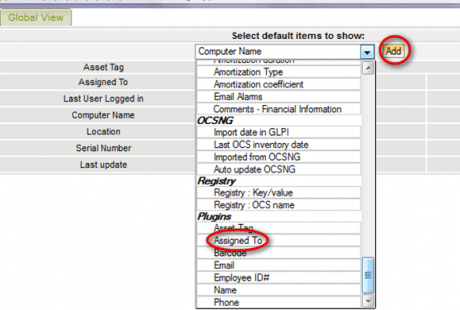
- Select the custom field name from the Dropdown menu and the Click on Add.
- Click on the arrow image like in the above image to arrange the order of the various fields on the list.
Do you have anything to add? Just leave a comment below.


